

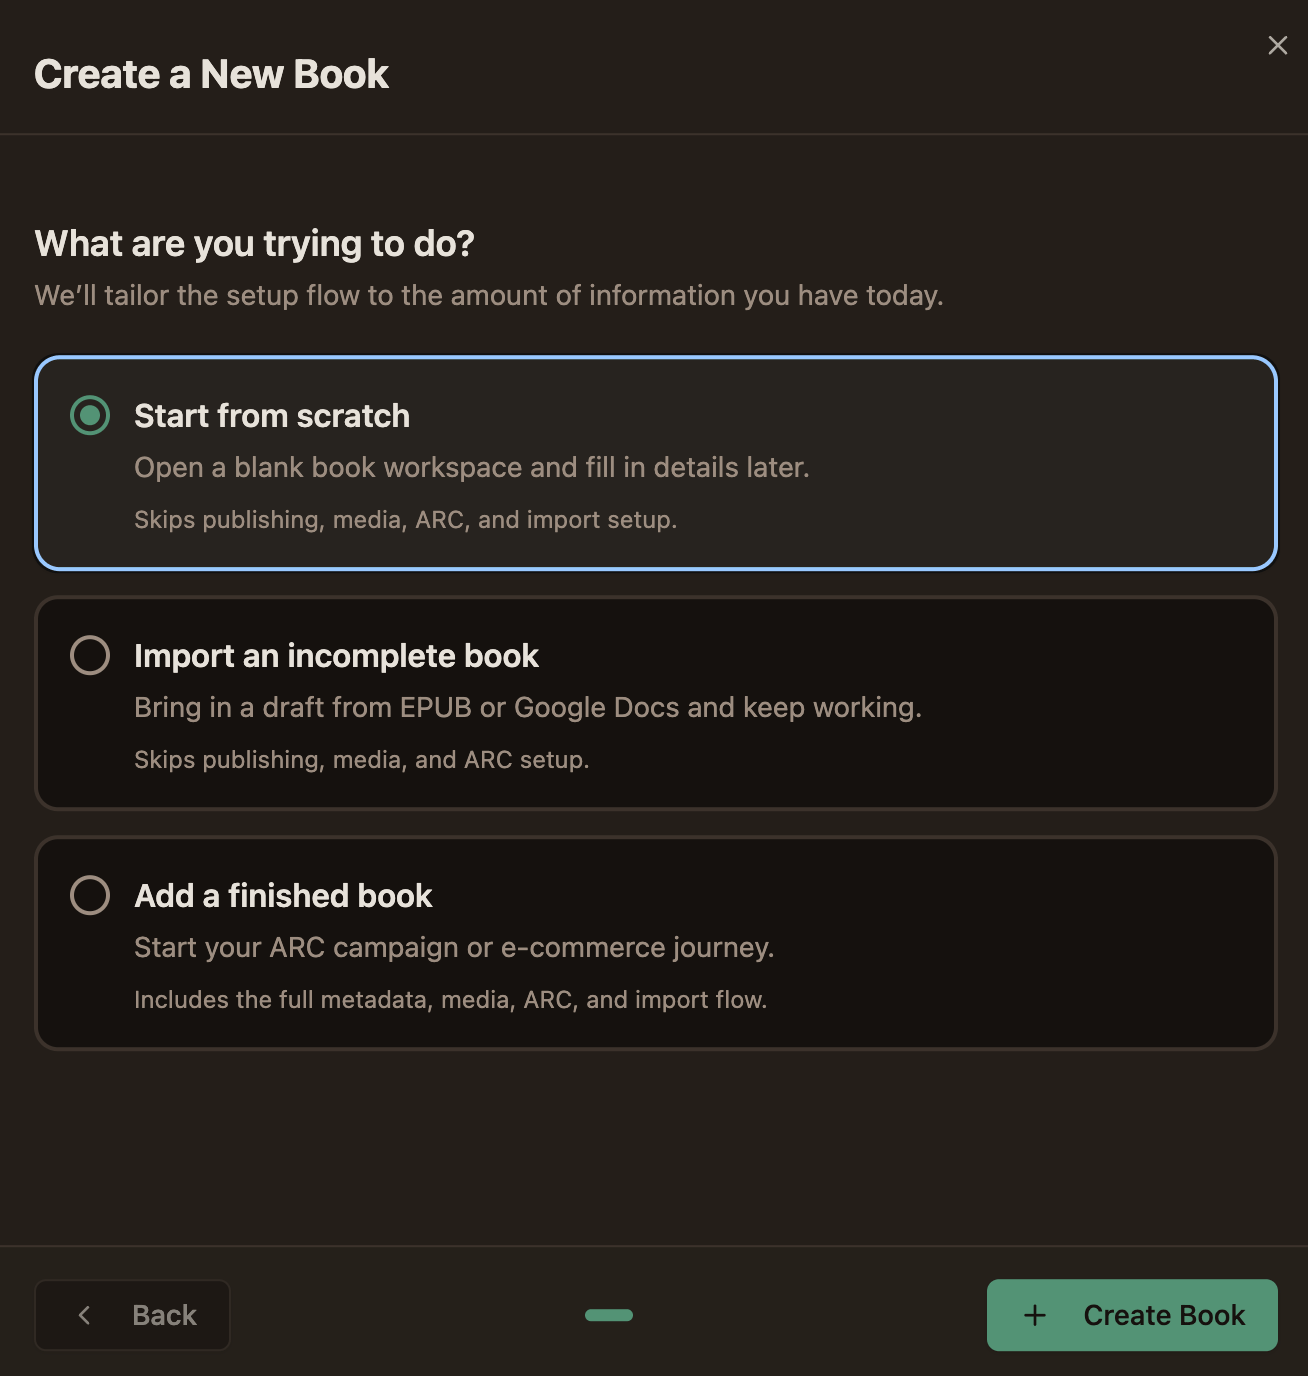
Once you’re all set up, it’s time to start working on your books. The platform will take you directly into creating your first book; alternatively, you can always start a new project by clicking the green + New Book button. When you click that button, the platform provides three ways to set up your project, depending on where it currently stands: Create from scratch: For starting a brand-new project with a completely blank slate. Import an incomplete book: For projects that were started elsewhere, allowing the existing draft to be brought in without tedious copying and pasting. Add a finished book: For bringing a fully completed manuscript into the system.
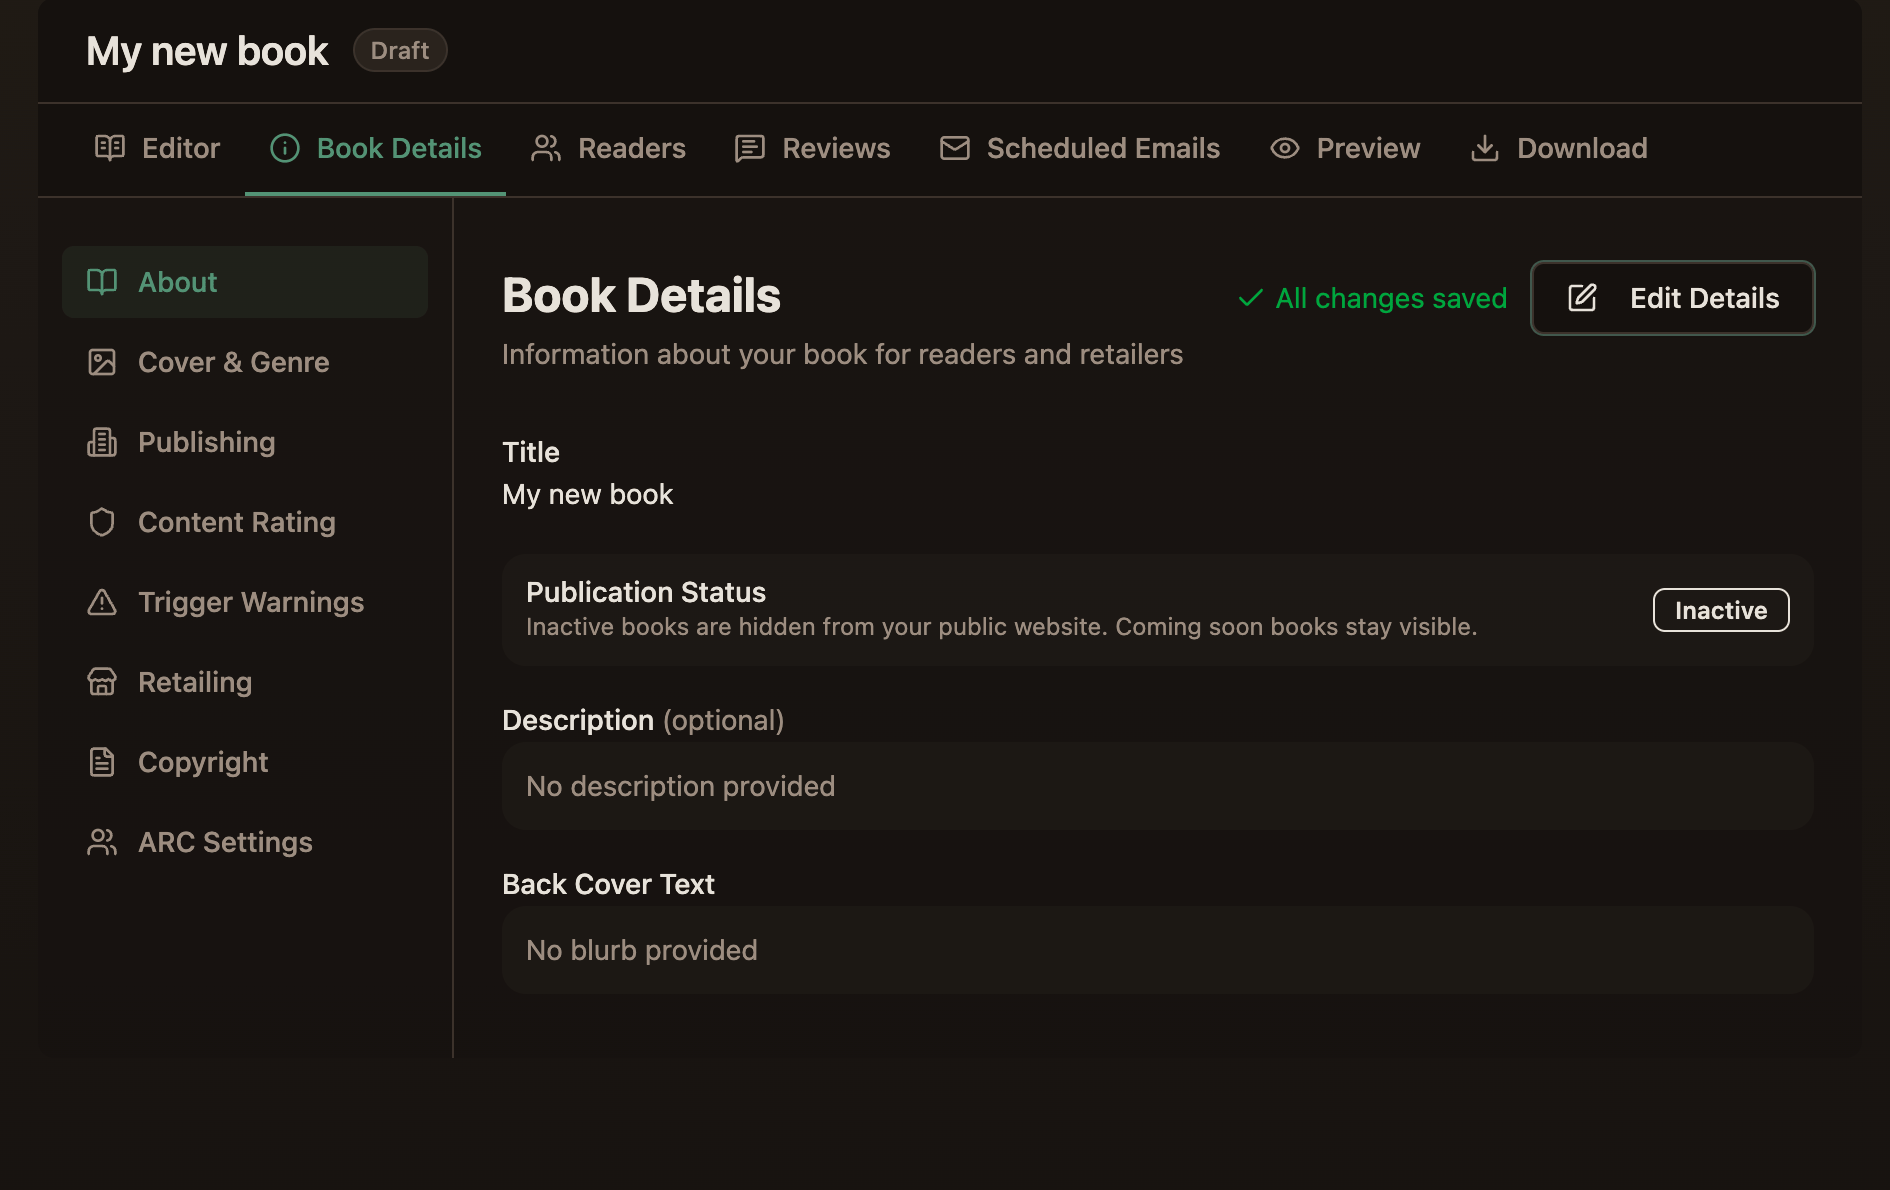
At the very top of the hub, the main horizontal tabs control the core operational stages of the book: Book Details, Readers, Reviews, Scheduled Emails, Preview, and Download. When the Book Details tab is active, a secondary menu opens on the left side of the screen to manage the metadata and legal details required for publishing. This menu includes: About: Where the title, description, and public publication status (such as “Coming Soon”) are configured. Cover & Genre: The visual identity and categorization of the book. Publishing & Retailing: Settings for managing how the book will be distributed and sold. If a book is already live, links can be added for the retailers selling it. These links will automatically appear in the book’s section on the public website, making it easy for readers to find a retailer and buy the book. Content Rating & Trigger Warnings: Essential transparency tools for readers before they open the file. Copyright: Legal ownership and licensing details. Think of this as your book’s official ID card. It protects your work and includes all the official fine print you see at the front of every book. ARC Settings: The control panel for managing an Advanced Review Copy campaign for this book specifically. This section allows an author to set up everything a reader sees when they sign up for an early copy. This includes capping how many reviewers can join, setting the exact date ranges for signups and file downloads, and customizing the signup page with a description and a personalized greeting for readers after they join the list.
You can edit an update any piece of information at any time by clicking the “Edit Details” button on the right side of the workspace. This section of CabinsPress acts as the central command center for your project(-s), keeping the “invisible” part organized so that everything is ready when it’s time to share your book with the world.